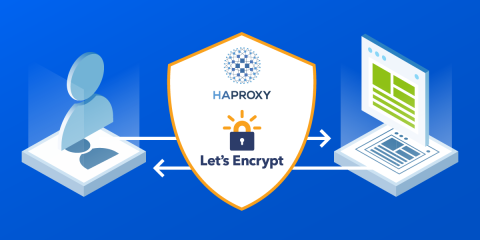
TLS certificates are crucial for the secure flow of web traffic, but managing these digital certificates can pose a challenge. Using an ACME-based certificate authority like Let’s Encrypt can automate and simplify the management of issuing these certificates.
Certificate management in HAProxy has steadily improved over the years, allowing it to become more flexible and load certificates without restarting. This improved certificate management has further been enhanced by HAProxy developer contribution to acme.sh to integrate smoothly with HAProxy.
HAProxy Enterprise is a flexible data plane layer that provides high-performance SSL/TLS processing, DDoS protection, bot management, global rate limiting, and a next-generation WAF.
HAProxy Enterprise is a core component of HAProxy One: the world's fastest application delivery and security platform that is the G2 category leader in API management, container networking, DDoS protection, web application firewall (WAF), and load balancing.
Now, with the release of HAProxy 2.8, we’re sharing the progress we’ve made on this integration so far. In this blog post, we break down what TLS certificate management is all about and how you can start taking advantage of the latest support improvements with the Let’s Encrypt client, acme.sh.
What is TLS Certificate Management?
Certificate management is the monitoring and handling of digital certificates to ensure they are up to date and renewed once expired. It oversees that your web application’s identifying information is always legitimate and accessible for clients accessing your services.
Transport Layer Security (TLS) certificates are a type of digital certificate that play an integral role in facilitating secure communication between servers and clients. When a client initiates a connection, a handshake occurs with the server where the client verifies the validity and authenticity of the TLS certificate before establishing a secure, TLS-encrypted connection.
If a certificate happens to be expired, the client will identify your web application as a security risk—an issue no business wants to have. Certificate management helps avoid this by automating the timely renewal of TLS certificates, protecting your business from mistakes, and ensuring your web applications are always identified as a trusted service.
Managing certificates and their expiration can be challenging, especially when it comes to scale and automation. Without an automated certificate management process, the manual management of certificates can be difficult to keep track of, especially when managing multiple web applications.
The process of certificate management can be facilitated by the interaction between acme.sh, an ACME client, and Let’s Encrypt, a certificate authority. When issuance or renewal is required, acme.sh automatically oversees the management and deployment of certificates via Let’s Encrypt (albeit with some manual work to get started). The combination of the client, acme.sh, and the certificate authority can simplify certificate management for your web applications.
What is Let's Encrypt, and why should you use it?
Let’s Encrypt is a certificate authority that provides the digital certificates needed to enable HTTPS for application delivery.
Let’s Encrypt, a free, open-source certificate authority, automates the process of issuing TLS certificates. The core principle behind Let’s Encrypt is that the service is provided for the public’s benefit. Let’s Encrypt makes obtaining and managing certificates painless. It is completely free to use and is based on open standards, which, if you don’t know already, HAProxy Technologies is passionate about.
Most importantly, Let’s Encrypt offers three key benefits for your application delivery.
Accessibility. Financial barriers are stripped away when it comes to using Let’s Encrypt, meaning you incur no additional expenses with the certificate authority service.
Automation. The streamlining of the issuance and renewal of certificates simplifies the certification process and saves your team time.
Community Support. Let’s Encrypt is backed by a large group of contributors, resources, and documentation, bringing invaluable support to HAProxy users.
Improved Support for HAProxy with Let’s Encrypt
With the release of HAProxy 2.8, the ACME client acme.sh is able to inform HAProxy deployments about newly issued certificates, and HAProxy is able to start using the new certificates immediately without restarting the process. This improvement means that when issuing and renewing TLS certificates, the HAProxy service can continue to run uninterrupted. HAProxy versions 2.2 and newer can also take advantage of this improved support.
Previously, you had to restart HAProxy to apply changes when deploying TLS certificates. Now, the improved support enhances service availability and efficiency in certificate management, and upholds security standards. The seamless integration of HAProxy with certificates results in a smooth, disruption-free experience for secure connections.
Installation and Configuration

As discussed, acme.sh integrates smoothly with HAProxy. With it, users are able to start an HAProxy configuration without a certificate, generate certificates with acme.sh, and populate HAProxy with them.
Here’s how to get started by running acme.sh as non-root. This procedure was written for Ubuntu 22.04, and while these instructions are tailored for Let’s Encrypt, acme.sh supports other ACME-compatible certificate authorities, with ZeroSSL being the default.
HAProxy Package Installation
Before starting, ensure HAProxy is up-to-date by installing the latest HAProxy packages available. The following instructions are tailored for the latest version, HAProxy 2.8.
acme.sh installation
While acme.sh is not available as a package, installing acme.sh is easy. In this tutorial, we run acme.sh with its own user, granting it the necessary permissions within the HAProxy group. This setup ensures that acme.sh can push certificates in the appropriate location.
First, on the HAProxy server, create the acme user:
| $ sudo adduser \ | |
| --system \ | |
| --disabled-password \ | |
| --disabled-login \ | |
| --home /var/lib/acme \ | |
| --quiet \ | |
| --force-badname \ | |
| --group \ | |
| acme |
Add the acme user to the HAProxy group:
| $ sudo adduser acme haproxy |
Create the directory where we will install the acme.sh program:
| $ sudo mkdir /usr/local/share/acme.sh/ |
Then install acme.sh:
| $ git clone https://github.com/acmesh-official/acme.sh.git | |
| $ cd acme.sh/ | |
| $ sudo ./acme.sh \ | |
| --install \ | |
| --no-cron \ | |
| --no-profile \ | |
| --home /usr/local/share/acme.sh | |
| $ sudo ln -s /usr/local/share/acme.sh/acme.sh /usr/local/bin/ | |
| $ sudo chmod 755 /usr/local/share/acme.sh/ |
Previously, we recommended installing the deploy script fork capable of updating certificates without restarting HAProxy and without requiring root access. However, the script has now been merged upstream.
Generate your ACME account
In this setup, acme.sh allows HAProxy to act as a proxy that responds to Let’s Encrypt challenges. With HAProxy typically handling HTTP traffic, it makes sense to have it also handle the challenges. To accomplish this, HAProxy will need to know the hash of the public key associated with your Let's Encrypt ACME account. Ordinarily, you don't see this detail because the Let's Encrypt client, in this case acme.sh, handles it for you and receives challenges directly. However, that approach requires extra complexity since we would need to relay the challenges to the acme.sh client. Considering we want HAProxy to receive the requests and send back responses itself, we need to get the hash and store it as a variable in the HAProxy configuration file.
To generate your ACME account, switch to the acme user so the ACME account info will be stored in this user's home directory. Replace "youremail@example.com" with the email address where you want to receive TLS certificate renewal notifications.
| $ sudo -u acme -s | |
| $ acme.sh --register-account \ | |
| --server letsencrypt_test \ | |
| -m youremail@example.com | |
| [Mon Apr 24 01:28:14 PM UTC 2023] Create account key ok. | |
| [Mon Apr 24 01:28:14 PM UTC 2023] Registering account: https://acme-staging-v02.api.letsencrypt.org/directory | |
| [Mon Apr 24 01:28:14 PM UTC 2023] Registered | |
| [Mon Apr 24 01:28:14 PM UTC 2023] ACCOUNT_THUMBPRINT='lCufto4sDRTHdmWL0EugFywGV54hBCuTTXvwifi65R4' | |
| $ exit |
Once the account is registered, note down the thumbprint as it will be used to configure HAProxy.
Note that we have set the server where we'd like to register an account to be letsencrypt_test, which is the Let's Encrypt staging server. It's a good idea to use this value while you test your setup. Once you've verified that everything is working, register again using a server value of letsencrypt (this server name is mandatory for successful configuration).
Configure HAProxy to Respond to HTTP Challenges

When configuring HAProxy, it’s important to understand that acme.sh operates in a stateless mode as an ACME client, meaning it does not generate response to Let's Encrypt challenges dynamically, but rather relies on HAProxy to handle the HTTP challenge. Once HAProxy is configured for the task, you won’t need to make any further changes. In order to achieve this, HAProxy must return a specific value during the challenge.
Start by creating the directory for certificates:
| $ sudo mkdir /etc/haproxy/certs | |
| $ sudo chown haproxy:haproxy /etc/haproxy/certs | |
| $ sudo chmod 770 /etc/haproxy/certs |
Edit /etc/haproxy/haproxy.cfg to add the challenge response and the thumbprint. Don't forget the stats socket—this is needed to enable the HAProxy Runtime API, which acme.sh will call in order to load certificates into HAProxy’s runtime memory:
| global | |
| stats socket /var/run/haproxy/admin.sock level admin mode 660 | |
| setenv ACCOUNT_THUMBPRINT 'lCufto4sDRTHdmWL0EugFywGV54hBCuTTXvwifi65R4' | |
| frontend web | |
| bind :80 | |
| bind :443 ssl crt /etc/haproxy/certs/ strict-sni | |
| http-request return status 200 content-type text/plain lf-string "%[path,field(-1,/)].${ACCOUNT_THUMBPRINT}\n" if { path_beg '/.well-known/acme-challenge/' } |
The strict-sni keyword will allow you to start HAProxy with the empty directory, and %[path,field(-1,/)] uses the random string Let’s Encrypt sent as part of the HTTP-01 challenge.
Restart the HAProxy service:
| $ sudo systemctl restart haproxy |
Generate a certificate
Now you can generate a certificate with acme.sh and HAProxy will respond to the challenge (this is visible in your HAProxy logs).
Switch to the previously created acme user and run the following command. Replace "example.com" with your own domain, which must resolve to an accessible, public IP address. Here again we use the Let's Encrypt staging server.
| $ sudo -u acme -s | |
| $ acme.sh --issue \ | |
| -d example.com \ | |
| --stateless \ | |
| --server letsencrypt_test | |
| [Mon Apr 24 01:36:03 PM UTC 2023] Using CA: https://acme-staging-v02.api.letsencrypt.org/directory | |
| [Mon Apr 24 01:36:03 PM UTC 2023] Single domain=example.com' | |
| [Mon Apr 24 01:36:03 PM UTC 2023] Getting domain auth token for each domain | |
| [Mon Apr 24 01:36:04 PM UTC 2023] Getting webroot for domain='example.com' | |
| [Mon Apr 24 01:36:04 PM UTC 2023] Verifying: example.com | |
| [Mon Apr 24 01:36:04 PM UTC 2023] Stateless mode for domain:example.com | |
| [Mon Apr 24 01:36:06 PM UTC 2023] Success | |
| [Mon Apr 24 01:36:06 PM UTC 2023] Verify finished, start to sign. | |
| [Mon Apr 24 01:36:06 PM UTC 2023] Lets finalize the order. | |
| [Mon Apr 24 01:36:06 PM UTC 2023] Le_OrderFinalize='https://acme-staging-v02.api.letsencrypt.org/acme/finalize/12345' | |
| [Mon Apr 24 01:36:06 PM UTC 2023] Downloading cert. | |
| [Mon Apr 24 01:36:06 PM UTC 2023] Le_LinkCert='https://acme-staging-v02.api.letsencrypt.org/acme/cert/abc12345' | |
| [Mon Apr 24 01:36:06 PM UTC 2023] Cert success. | |
| -----BEGIN CERTIFICATE----- | |
| [...] | |
| -----END CERTIFICATE----- | |
| [Mon Apr 24 01:36:06 PM UTC 2023] Your cert is in: /var/lib/acme/.acme.sh/example.com_ecc/example.cer | |
| [Mon Apr 24 01:36:06 PM UTC 2023] Your cert key is in: /var/lib/acme/.acme.sh/example.com_ecc/example.key | |
| [Mon Apr 24 01:36:06 PM UTC 2023] The intermediate CA cert is in: /var/lib/acme/.acme.sh/example.com_ecc/ca.cer | |
| [Mon Apr 24 01:36:06 PM UTC 2023] And the full chain certs is there: /var/lib/acme/.acme.sh/example.com_ecc/fullchain.cer |
Certificate deployment

Once the certificate is generated, you can deploy it to the /etc/haproxy/certs directory and enable it in HAProxy without needing to reload. This is possible because you configured the Runtime API by adding a stats socket directive to your HAProxy configuration.
Now, call the acme.sh --deploy command, setting the values for DEPLOY_HAPROXY_STATS_SOCKET and DEPLOY_HAPROXY_PEM_PATH to match the appropriate path of the Runtime API socket and the directory where the certificates will be stored. Be careful not to add a trailing slash in DEPLOY_HAPROXY_PEM_PATH, as it won't be able to match the HAProxy configuration.
| $ sudo -u acme -s | |
| $ DEPLOY_HAPROXY_HOT_UPDATE=yes \ | |
| DEPLOY_HAPROXY_STATS_SOCKET=/var/run/haproxy/admin.sock \ | |
| DEPLOY_HAPROXY_PEM_PATH=/etc/haproxy/certs \ | |
| acme.sh --deploy -d example.com --deploy-hook haproxy | |
| [Mon Apr 24 02:17:31 PM UTC 2023] The domain 'example.com' seems to have a ECC cert already, lets use ecc cert. | |
| [Mon Apr 24 02:17:31 PM UTC 2023] Deploying PEM file | |
| [Mon Apr 24 02:17:31 PM UTC 2023] Moving new certificate into place | |
| [Mon Apr 24 02:17:31 PM UTC 2023] Creating new certificate '/etc/haproxy/certs/example.com.pem' over HAProxy stats socket. | |
| [Mon Apr 24 02:17:31 PM UTC 2023] Success |
This command will deploy the certificate to /etc/haproxy/certs and inject the certificate over the HAProxy Runtime API.
Once complete, you can check if the certificate was added in HAProxy with socat:
| $ echo "show ssl cert /etc/haproxy/certs/example.com.pem" |\ | |
| socat /var/run/haproxy/admin.sock - | |
| Filename: /etc/haproxy/certs/example.com.pem | |
| Status: Used | |
| Serial: 6C058BA29A03DF58BFA9CF0ABD0C0AB8 | |
| notBefore: Apr 24 13:35:04 2023 GMT | |
| notAfter: Apr 25 13:36:04 2023 GMT | |
| Subject Alternative Name: DNS:example.com | |
| Algorithm: EC256 | |
| SHA1 FingerPrint: 7A6A64B2D3BB1E548DBF383FDB3A7CA8434B3F5A | |
| [...] |
And then directly with curl:
| $ curl https://example.com |
Be sure to update your firewall settings to open port 443. Once things appear to be working, switch to using the Let's Encrypt production server.
Certificate renewal
The certificates can be renewed and updated automatically using the --cron option. It is recommended to use the crontab of the acme user, which we created with the --system flag, or use a systemd timer.
Crontab
Using the crontab is easy since this is integrated in acme.sh:
| $ sudo -u acme -s | |
| $ crontab -e | |
| $ acme.sh --install-cronjob |
Systemd Timer
The following is inspired by GitHub.
Create a new systemd service by defining the file /etc/systemd/system/acme_letsencrypt.service:
| [Unit] | |
| Description=Renew Let's Encrypt certificates using acme.sh | |
| After=network-online.target | |
| [Service] | |
| Type=oneshot | |
| # --home's argument should be where the acme.sh script resides. | |
| ExecStart=/usr/local/bin/acme.sh --cron | |
| User=acme | |
| Group=acme | |
| SuccessExitStatus=0 2 |
Test the service:
| $ systemctl daemon-reload | |
| $ systemctl start acme_letsencrypt |
Create a time in /etc/systemd/system/acme_letsencrypt.timer:
| [Unit] | |
| Description=Daily renewal of Let's Encrypt's certificates | |
| [Timer] | |
| OnCalendar=daily | |
| RandomizedDelaySec=1h | |
| Persistent=true | |
| [Install] | |
| WantedBy=timers.target |
Enable the timer:
| $ systemctl start acme_letsencrypt.timer | |
| $ systemctl enable acme_letsencrypt.timer |
Conclusion
By following these instructions, you can take advantage of the improved integration of HAProxy with acme.sh and simplify your certificate management with Let’s Encrypt. Eliminating the need to restart HAProxy during certificate generation results in a smoother experience in establishing secure connections between the client and server, and in the end, maintains the overall security of your application delivery.