AWS Auto Scaling groups are a powerful tool for creating scaling plans for your application. They let you dynamically create a group of EC2 instances that will maintain a consistent and predictable level of service. HAProxy’s Data Plane API adds a cloud-native method known as Service Discovery to add or remove these instances within a backend in your proxy as scaling events occur.
In this article, we’ll take a look at the steps used to integrate this functionality into your workflow. We’ll create an AWS Auto Scaling group using a custom launch template. Then we’ll add an HAProxy Enterprise instance in the form of a preconfigured AMI. Finally, we’ll use the Data Plane API to enable service discovery.
Of course, you have the option of using the community version of HAProxy, though its installation and configuration are outside the scope of this blog post.
To begin, log in to your AWS Console and select AWS Services, All Services, EC2.
Create a Launch Template
Launch Templates are a list of the parameters that are the same across all of the instances. You can think of them as a generic description of each of the servers that make up your application, such as the machine image and instance type, without the parameters that are unique to the instance, such as its unique hostname.
When instances are created using the launch templates, the HAProxy Data Plane API monitors its Virtual Private Cloud (VPC) for specially-tagged instances to monitor and use. This is known as Service Discovery.
Let’s create a new launch template that will serve as the blueprint for creating application servers.
In the AWS console, select Instances > Launch Templates > Create launch template.
Use the following values to create a simple template:
Key | Value |
Launch template name | “MyTemplate“ |
Template version description | “A prod webserver for MyApp“ |
Auto Scaling guidance | Selected [X] |
There are two types of tags that you can define on the template creation screen: Template Tags and Resource Tags. Template tags attach to the template itself, while resource tags are passed on to the created instances. Add the following resource tags to the template. These tags tell the HAProxy Data Plane API that the instances created from this template are to be discovered and that these instances are to be used as servers in a backend.
Tag | Value |
HAProxy:Service:Name | MyApp |
HAProxy:Service:Port | 80 |
It is critical that the tags themselves are named exactly as shown here for the service discovery to succeed. The value you assign to the HAProxy:Service:Name tag is up to you. The port specified in HAProxy:Service:Port is the port that your application listens on.
The launch template we’re creating will deploy the free trial of Develatio’s ExpressJS AMI. Of course, you can use any AMI and application of your choosing. We’re using this machine image, as it comes preconfigured with a simple ExpressJS application that by default serves a page that will let you know that everything is working. These instances will listen on port 80, which we have indicated with the HAProxy:Service:Port tag above.
The t2.micro instance is a free tier-eligible machine that can run our simple backend service.
Key | Value |
Amazon Machine Image (AMI) | |
Instance Type | t2.micro |
Create or select an existing key pair to use for securely communicating with your servers. Carefully save this key for later use, as it is not possible to retrieve it from the AWS console later.
Select the Virtual Private Cloud (VPC) into which AWS will launch the ExpressJS servers and the default security group that allows HAProxy Enterprise to route requests to them.
Create Auto Scaling Group
Now that you’ve defined a launch template, let’s create an auto-scaling group that will handle creating new instances based on that template.
From the left-hand menu, select Auto Scaling groups and click Create Auto Scaling group. Give your Auto Scaling group a name such as MyASG.
Select the template you just created, MyTemplate, from the list. You will see that you have the option to select a version of the template. If you have just created your template, you will likely have only one version, Default (1). If you modify your template at any time, you will need to update this selection to the correct version.
Auto Scaling groups have the option of using either “On-Demand” or “Spot” instances. Spot instances are significantly cheaper than on-demand instances:
A Spot Instance is an instance that uses spare EC2 capacity that is available for less than the On-Demand price. Because Spot Instances enable you to request unused EC2 instances at steep discounts, you can lower your Amazon EC2 costs significantly. The hourly price for a Spot Instance is called a Spot price. The Spot price of each instance type in each Availability Zone is set by Amazon EC2 and is adjusted gradually based on the long-term supply of and demand for Spot Instances.
As we did not specify a preference during template creation, we have the option here to mix Spot and On-Demand instance types.
Next, select the default VPC, subnet and select “No load balancer.” For this role, we will be using HAProxy Enterprise as our load balancer.
Specify the number of instances in the Auto Scaling group. For this exercise, specify “1” for each of the desired, minimum, and maximum capacity settings.
AWS Security Groups are a virtual firewall for your EC2 instances to control incoming and outgoing traffic. For the servers in our application pool, we will use the default security group created by AWS.
Once you have created your Auto Scaling group, AWS automatically launches it
The HAProxy Enterprise Load Balancer
Next, let’s add an HAProxy Enterprise AMI as a load balancer. This instance is created outside of the Auto Scaling group, and will automatically create its own security group. Specify the same key pair as before.
From the EC2 Dashboard, select Instances and click Launch Instances.
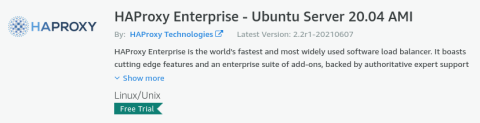
Search for “HAProxy Enterprise Ubuntu” in the AMI search string to see the official HAProxy Enterprise machine images and choose the HAProxy Enterprise image built on Ubuntu 20.04. If you are testing in a non-production environment, you could specify t2.large as the instance type, but for anything more, we recommend either C (Compute) or M (Machine, general-purpose) types, size large or xlarge at minimum, or N-type (Network Optimized) for heavier workloads.
When the instance is started, connect using SSH:
| $ ssh -i ~/MyKeyPair.pem ubuntu@<public_ip_of_instance> |
We need to add a user to the Data Plane API before we can use it. As we’ll be using an encrypted password to connect, ensure that the mkpasswd command from the whois package is installed:
| $ sudo apt install -y whois | |
| $ mkpasswd -m sha-256 mypassword | |
| # encrypted password: | |
| # $5$sj7aJ5nSSX1693nT$IVBQYoexyD2qaTeMOTym6evFqHRN9289gIw9UyAHKp5 |
Create a new section in your configuration file that includes this encrypted password:
| userlist hapee-dataplaneapi | |
| user admin password $5$sj7aJ5nSSX1693nT$IVBQYoexyD2qaTeMOTym6evFqHRN9289gIw9UyAHKp5 |
Save and close the file. Restart the HAProxy Enterprise service:
| $ sudo systemctl restart hapee-2.2-lb |
Enable Service Discovery
To enable service discovery, we will need to add a pair of AWS authentication credentials.
From the top-right section of the AWS console, click on your username and select “My Security Credentials”. Open the “Access Keys” tab.
Create a new access key and download it to your computer. These credentials come in two parts: an access key ID and a secret access key.
If you lose the secret access key, there is no way to retrieve it from AWS.
To enable service discovery, run the following curl command from the HAProxy instance, substituting your own username, password, region, and AWS credentials in the example below:
| $ curl -H 'Content-Type: application/json' -u admin:adminpwd -d '{ | |
| "access_key_id":"AKIAXXXXXXXXXXXXXXXX", | |
| "secret_access_key":"ZGSNXXXXXXXXXXXXXXXXXXXXXXXXXXXXXXXXXXXX", | |
| "description":"AWS EC2 Production Environment", | |
| "enabled":true, | |
| "ipv4_address":"private", | |
| "name":"www", | |
| "region":"us-east-1", | |
| "retry_timeout":10}' http://127.0.0.1:5555/v2/service_discovery/aws |
This command sends configuration and authentication data to the Data Plane API’s AWS service discovery endpoint. Upon successful registration, it returns a JSON result that will look like the following:
| { | |
| "access_key_id": "AKIAXXXXXXXXXXXXXXXX", | |
| "allowlist": null, | |
| "denylist": null, | |
| "description": "AWS EC2 Production Environment", | |
| "enabled": true, | |
| "id": "ffdf439e-a947-4401-a0db-6f7cb3ac3c40", | |
| "ipv4_address": "private", | |
| "name": "www", | |
| "region": "us-east-1", | |
| "retry_timeout": 10, | |
| "secret_access_key": "ZGSNXXXXXXXXXXXXXXXXXXXXXXXXXXXXXXXXXXXX", | |
| "server_slots_base": 10, | |
| "server_slots_growth_type": "exponential" | |
| } |
Re-open your configuration file. You will notice that a new backend has been created.
As the AWS Auto Scaling group has only one member, this backend has one server enabled out of the ten specified by “server_slots_base”: 10
| backend aws-us-east-1-www-API-80 | |
| server SRV_4vhrR 172.31.0.70:80 check weight 128 | |
| server SRV_jOEoa 127.0.0.1:80 disabled weight 128 | |
| server SRV_tce8j 127.0.0.1:80 disabled weight 128 | |
| server SRV_njnGf 127.0.0.1:80 disabled weight 128 | |
| server SRV_R0V1R 127.0.0.1:80 disabled weight 128 | |
| server SRV_Bc83k 127.0.0.1:80 disabled weight 128 | |
| server SRV_mnkyy 127.0.0.1:80 disabled weight 128 | |
| server SRV_zMQ6S 127.0.0.1:80 disabled weight 128 | |
| server SRV_MowJa 127.0.0.1:80 disabled weight 128 | |
| server SRV_4oEP4 127.0.0.1:80 disabled weight 128 |
At this point, you can use this backend as you would any other. You can use the Data Plane API to programmatically create a frontend and add it as the default backend. Here, we’ll make a quick manual edit to add it as the backend for a frontend called public_web_servers:
| frontend public_web_servers | |
| mode http | |
| log global | |
| timeout client | |
| bind *:80 | |
| default_backend aws-us-east-1-www-API-80 |
After making a manual edit, reload HAProxy:
| $ sudo systemctl reload hapee-2.2-lb |
Conclusion
In this simple example, we’ve set up an AWS Auto Scaling group that maintains a pool of servers for an application.
We’ve also set up HAProxy Enterprise and enabled EC2 instance service discovery within the HAProxy Data Plane API. This created a new HAProxy backend that will automatically add new servers and drop deleted servers as changes occur within the Auto Scaling group. Once created, this backend can be used like any standard HAProxy backend.
Our example set up a pool with a single instance by default, but this could be easily scaled to a dozen or a hundred instances, with almost no added complexity or further configuration, by configuring your auto-scaling group to use any number of instances.
Want to know when more content like this is published? Subscribe to our blog or follow us on Twitter. You can also join the conversation on Slack.
Subscribe to our blog. Get the latest release updates, tutorials, and deep-dives from HAProxy experts.