With HTTP REST APIs serving as the backbone of modern web applications, securing those APIs presents a critical challenge for organizations. APIs are typically designed to be discoverable, self-documenting, and easily consumed by a range of programming languages, and that makes them appetizing for hackers.
Strong authentication / authorization protocols helps to ensure that clients cannot see data or perform an action they shouldn’t have access to. Unfortunately, many of us fall short. The OWASP Top 10, which tracks the most prevalent threats to web applications, places Broken Access Control at the top of the list with more occurrences than any other category in 2021. In other words, plenty of web-based APIs suffer from inadequate means of stopping bad actors from performing actions they shouldn’t be able to.
To overcome that, companies can use the OAuth 2 protocol, which uses JSON Web Tokens (JWTs) to convey a client’s level of access for a service. JWTs, which contain a client’s permissions (but not their identity) within a payload of base64-encoded JSON data, serve as a client’s proof of membership and encapsulate the fine-grained permissions they have. A JWT is cryptographically signed by the party that authenticated the client, and you can require that each HTTP request comes with a JWT to verify whether the requested action should be allowed.
HAProxy 2.5 introduced configuration directives that cover all of the functionality needed to support OAuth 2, including checking that a token:
has not expired
was issued and signed by a trusted authentication service
is meant for your service and not someone else’s
contains any necessary claims to grant a client a specific type of access (for example, read or write access)
In prior versions, you could load the HAProxy-OAuth Lua library into HAProxy to gain OAuth 2 support. The Lua library served its purpose well enough, but any time you can integrate a feature directly into HAProxy’s C codebase instead of invoking an external library, performance is bound to be better.
In this blog post, you’ll learn how to protect your APIs from unauthorized clients using HAProxy’s built-in JWT verification features.
Sign up with an Authentication Service
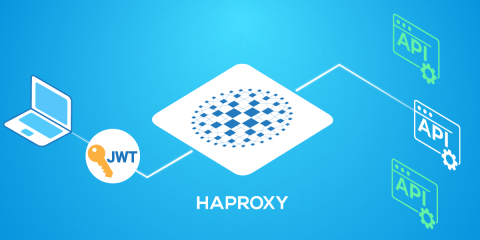
Since we’re talking about protecting APIs, the client will be an application calling the API, rather than a human user. In this post, we look at the OAuth 2 client credentials flow, wherein a software client first authenticates with a third-party service like Auth0 to get an access token. The client then attaches that token to requests it makes to your service.
HAProxy, which sits in front of your service, verifies that the token is genuine and checks it to see which permissions the client should have. You can either have HAProxy forward those permissions on to your service via HTTP headers or make a decision within HAProxy to deny the request then and there. For example if the client is requesting to update data with a PUT request, but they do not have the write permission, you can have HAProxy deny the request.
First, you’ll need to sign up for a service that can authenticate clients and return to them an access token. HAProxy doesn’t handle that part, and only comes into play when validating the token and reading it to see which permissions a client should have.
I recommend the Auth0 authentication service, which is easy to set up.
Create an account with Auth0.
Log in and go to Applications > APIs to create your API. This represents the API for which you’ll require a token. When creating your API, note that the Identifier field will be the audience in the token (more on that to come) and is typically a URL like https://api.mywebsite.com. The Signing Algorithm can be RS256 or HS256. The former uses an X.509 key pair to verify the signature, while the latter, HS256, uses a shared secret. HAProxy supports both.
In Auth0, go to Applications > Applications to create a Machine to Machine Applications that will be calling your API. When creating the application, you choose which APIs it should have access to and its permissions.
Go to Applications > Applications > Your App > Settings > Advanced Settings > Certificates and download the public key for the application, which you’ll reference when configuring HAProxy. Convert the downloaded PEM file using this command:
| $ openssl x509 -pubkey -noout -in ./myaccount.pem > pubkey.pem |
You can then follow the Quick Start on the application’s dashboard to see how to make a call to get an access token. For example, with cURL it looks like this:
| $ curl --request POST \ | |
| --url https://myaccount.auth0.com/oauth/token \ | |
| --header 'content-type: application/json' \ | |
| --data '{"client_id":"abcd12345….","client_secret":"ABCD12345…","audience":"https://api.mywebsite.com","grant_type":"client_credentials"}' | |
| { | |
| "access_token":"eyJhbGciOiJSUzI1NiIsInR5cCI6Ikp...", | |
| "scope":"read:myapp write:myapp", | |
| "expires_in":86400, | |
| "token_type":"Bearer" | |
| } |
This request returned an access token inside a JSON response, which expires after 24 hours.
If you take your token to https://jwt.io/#debugger-io and paste it into the Encoded box, you can see what’s inside. For example:
| { | |
| "alg": "RS256", | |
| "typ": "JWT" | |
| } | |
| { | |
| "iss": "https://myaccount.auth0.com/", | |
| "aud": "https://api.mywebsite.com", | |
| "exp": 1662753594, | |
| "scope": "read write", | |
| "gty": "client-credentials" | |
| } | |
| { | |
| // RSASHA256 signature | |
| } |
It contains three parts:
a header
a payload
a cryptographic signature
The header indicates which algorithm was used to sign the token. The payload contains the name of the issuer, the intended audience, the expiration date, and any permissions (also known as scopes).
Configure HAProxy for JWTs
Here is how you should configure HAProxy to receive and validate requests with tokens:
| frontend myapi | |
| bind :80 | |
| bind :443 ssl crt /etc/haproxy/certs/foo.com/cert.crt alpn h2 | |
| http-request redirect scheme https unless { ssl_fc } | |
| http-request deny content-type 'text/html' string 'Missing Authorization HTTP header' unless { req.hdr(authorization) -m found } | |
| # get header part of the JWT | |
| http-request set-var(txn.alg) http_auth_bearer,jwt_header_query('$.alg') | |
| # get payload part of the JWT | |
| http-request set-var(txn.iss) http_auth_bearer,jwt_payload_query('$.iss') | |
| http-request set-var(txn.aud) http_auth_bearer,jwt_payload_query('$.aud') | |
| http-request set-var(txn.exp) http_auth_bearer,jwt_payload_query('$.exp','int') | |
| http-request set-var(txn.scope) http_auth_bearer,jwt_payload_query('$.scope') | |
| # Validate the JWT | |
| http-request deny content-type 'text/html' string 'Unsupported JWT signing algorithm' unless { var(txn.alg) -m str RS256 } | |
| http-request deny content-type 'text/html' string 'Invalid JWT issuer' unless { var(txn.iss) -m str https://myaccount.auth0.com/ } | |
| http-request deny content-type 'text/html' string 'Invalid JWT audience' unless { var(txn.aud) -m str https://api.mywebsite.com } | |
| http-request deny content-type 'text/html' string 'Invalid JWT signature' unless { http_auth_bearer,jwt_verify(txn.alg,"/etc/haproxy/pubkey.pem") -m int 1 } | |
| http-request set-var(txn.now) date() | |
| http-request deny content-type 'text/html' string 'JWT has expired' if { var(txn.exp),sub(txn.now) -m int lt 0 } | |
| http-request deny if { path_beg /api/ } { method GET } ! { var(txn.scope) -m sub read } | |
| http-request deny if { path_beg /api/ } { method DELETE POST PUT } ! { var(txn.scope) -m sub write } | |
| default_backend servers | |
| backend servers | |
| balance roundrobin | |
| server web1 192.168.56.31:3000 check maxconn 30 |
Here’s a breakdown of the configuration:
We get the token from the Authentication HTTP header by using the
http_auth_bearerfetch method. Thejwt_header_queryconverter then extracts fields from the token’s header and thejwt_payload_queryconverter extracts fields from the payload. We store the fields in variables by using thehttp-request set-vardirective.We use the
http-request denydirective to deny requests that fail validation in some way. This directive allows you to set a string parameter, which lets you return an error message to the user.We verify the token’s signature using the
jwt_verifyconverter.We relay valid requests to the backend named servers.
Here’s how we’re validating the token:
Was the token signed using an algorithm we support? In this case, we allow RS256.
Can the token’s signature be verified using the Auth0 public key that we downloaded?
Is the issuer the expected value, https://myaccount.auth0.com/, which is our Auth0 account name?
Is the audience the expected value, https://api.mywebsite.com, which is the Identifier we set for the API in Auth0.
Has the token expired? We use a trick in HAProxy to compare two integer timestamps—which is to subtract the current timestamp from the expiration date timestamp, and check whether the result is less than zero.
Does the token’s scopes field contain the permissions necessary to perform the requested action? Here we consider GET requests to be read actions and DELETE, POST, and PUT requests to be write actions.
Note that this is based on the fields present when the token is created by Auth0. When using another authorization service, the names of the fields could be different. Inspect the token to find out.
Call your service at the address where HAProxy is listening, with the token set in the Authorization header, such as:
| $ curl --request GET \ | |
| -k \ | |
| --url https://192.168.56.20/ \ | |
| --header 'authorization: Bearer eyJhbGciOiJSUzI1NiIsInR5cCI6Ikp...' |
Conclusion
In this blog post, you learned how to secure your APIs against unauthorized access. The OAuth 2 protocol uses JSON Web Tokens to convey a client’s permissions, and HAProxy 2.5 and later can verify whether a token can be trusted. The OAuth protocol lets you define fine-grained permissions within a JWT, and it protects them from tampering by signing them with a cryptographic algorithm.
Interested to know when we publish content like this? Subscribe to our blog! You can also follow us on Twitter and join the conversation on Slack.
Subscribe to our blog. Get the latest release updates, tutorials, and deep-dives from HAProxy experts.


