Network
Assign IP addresses
Use the web UI or CLI to add or change the HAProxy ALOHA static IP address.
Assign a static IP address through the web UI Jump to heading
You must assign a static internal IP address to your appliance.
Info
Use this IP address for managing the appliance. It can be different from the IP address used to receive incoming traffic.
If you manage a pair of appliances, assign each one a different IP address so you can connect to each of them.
-
Connect to the web UI as user
adminwith the passwordadminathttp://<IP Address>:4444/. -
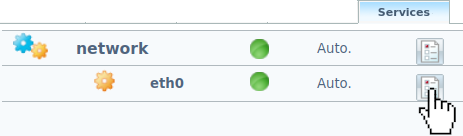
In the Services tab, click network instance setup next to a network interface.
-
Do one of the following:
-
Enter an IP address and a network mask, either class mask or CIDR format.
Example:
Network Interface Setupservice network eth0
  # Class mask format:
  ip address 172.16.24.237/255.255.255.0
  # CIDR format:
  # ip address 172.16.24.237/24
Network Interface Setupservice network eth0 # Class mask format: ip address 172.16.24.237/255.255.255.0 # CIDR format: # ip address 172.16.24.237/24 -
Enter an IP address alias and a network mask, either class mask or CIDR format.
Example:
Network Interface Setupservice network eth0
  # Class mask format:
  ip address 172.16.24.237/255.255.255.0
  ip address 172.16.24.238/255.255.255.255
  # CIDR format:
  # ip address 172.16.24.237/24
  # ip address 172.16.24.238/32
Network Interface Setupservice network eth0 # Class mask format: ip address 172.16.24.237/255.255.255.0 ip address 172.16.24.238/255.255.255.255 # CIDR format: # ip address 172.16.24.237/24 # ip address 172.16.24.238/32
-
-
Reload the network interface.
-
In the Setup tab, click Save under Configuration to persist your changes after a reboot.
Assign a static IP address through the CLI Jump to heading
-
Connect to the appliance as user
adminwith the passwordadminthrough:- SSH at
http://<IP Address>:4444/, or - the serial port.
In version 13.5 and later, you can also click Launch a terminal in the web UI’s Tools tab.
- SSH at
-
Get root access.
nixrootnixroot -
Set up the device hostname.
nixconfig set system hostname <HOSTNAME>nixconfig set system hostname <HOSTNAME>Example:
nixconfig set system hostname MYALOHAnixconfig set system hostname MYALOHA -
Set up the IP address for the
eth0network interface.nixconfig set network.eth0 ip-address <IP/NETMASK>nixconfig set network.eth0 ip-address <IP/NETMASK>Example:
nixconfig set network.eth0 ip-address 172.16.24.237/24nixconfig set network.eth0 ip-address 172.16.24.237/24 -
Set up the default gateway.
nixconfig set network.eth0 ip-route-default <GATEWAY>nixconfig set network.eth0 ip-route-default <GATEWAY>Example:
nixconfig set network.eth0 ip-address 172.16.24.238nixconfig set network.eth0 ip-address 172.16.24.238 -
Apply your configuration.
nixservice network restartnixservice network restart -
Connect HAProxy ALOHA to your network using its
eth0network interface. -
Ping HAProxy ALOHA.
-
If the ping succeeds, save the configuration.
nixconfig savenixconfig save
Troubleshooting Jump to heading
This section describes common troubleshooting steps.
Duplicate IPs
To troubleshoot duplicate IPs, you can use the ARP who-has diagnostic tool.
This tool checks if the MAC address associated with the IP address is the one expected or not:
-
If yes, the problem may be on an upper layer
-
If not, the MAC address of the server has the duplicated IP
Ping
You can use the ping diagnostic tool to try to reach an IP address on the network.
Do you have any suggestions on how we can improve the content of this page?