Single sign-on
Single sign-on (Kerberos)
Kerberos is an authentication protocol. It is the default authentication protocol in Windows. The Single Sign-On (SSO) module integrates with Kerberos to let users to sign in to an HTTP application with Windows Active Directory credentials. Kerberos doesn’t typically go over HTTP, but an extension to the HTTP protocol, RFC 4559, adds a way to negotiate the protocol via the Www-Authenticate and Authorization HTTP headers. Then Kerberos tickets (identity tokens) are exchanged over the network by wrapping them inside Simple and Protected Negotiate (SPNEGO) tokens, defined by RFC 4178.
HAProxy Enterprise, being in front of the HTTP applications for which you want to enable single sign-on, validates the user’s Kerberos ticket and grants them access. Therefore, the applications themselves do not need to implement Kerberos directly.
To implement single sign-on using Kerberos, we will complete the following steps:
Configure Windows Server Jump to heading
In this section, you will configure Windows Server for Kerberos authentication.
Prerequisites Jump to heading
On Windows Server, please check that the following prerequisites have been met:
- You’ve installed the Active Directory Domain Services role.
- You’ve promoted the Windows Server instance to be a domain controller. A domain controller is a Windows Server where you administer Active Directory.
- You’ve created an Active Directory domain. In this guide, we will use the domain
example.com. - You’ve installed the DNS Server role.
Create a user account and SPN Jump to heading
With Kerberos, every service gets a unique Service Principal Name (SPN). An SPN identifies a service running on a host. Because HAProxy Enterprise will act as a proxy in front of the applications, we will assign the SPNs to it. In Windows Server, we will create a user account in Active Directory to represent the load balancer and then assign to it an SPN for each load balanced web app. It might seem odd to assign a user account to a load balancer, but this is simply where we will map which services the load balancer can accept authorization requests for. By doing this, we are able to generate a keytab file, which we will store on the load balancer. When a user accesses the service via the load balancer, they present a ticket that the load balancer must decrypt with its keytab to prove that it is authorized by Active Directory.
-
Log in to your AD domain controller.
-
Open PowerShell and create a new user with the
New-ADUsercommand. Note that the backtick is the word-wrap operator, allowing you to split the command onto multiple lines. Change the password used in the example:powershellNew-ADUser `-Name loadbalancer1 `-Description "Load balancer 1 service account" `-AccountPassword (ConvertTo-SecureString "P@ssword1" -AsPlainText -Force) `-PasswordNeverExpires $true `-KerberosEncryptionType AES256 `-Enabled $truepowershellNew-ADUser `-Name loadbalancer1 `-Description "Load balancer 1 service account" `-AccountPassword (ConvertTo-SecureString "P@ssword1" -AsPlainText -Force) `-PasswordNeverExpires $true `-KerberosEncryptionType AES256 `-Enabled $true -
Create a keytab file for the account by calling the
ktpasscommand from PowerShell. The command does two things:- Maps the Service Principal Name
HTTP/webapp.example.com@EXAMPLE.COMto the AD user accountexample\loadbalancer1. The load balancer is then authorized to proxy requests for the servicewebapp.example.com. - Generates a keytab file at
C:\loadbalancer1.keytab, which contains the service’s key. After you’ve copied this file to the load balancer, the load balancer will be able to decrypt tickets.
powershellktpass /out C:\loadbalancer1.keytab /princ HTTP/webapp.example.com@EXAMPLE.COM /mapUser example\loadbalancer1 /crypto AES256-SHA1 /pType KRB5_NT_PRINCIPAL /pass +rndPasspowershellktpass /out C:\loadbalancer1.keytab /princ HTTP/webapp.example.com@EXAMPLE.COM /mapUser example\loadbalancer1 /crypto AES256-SHA1 /pType KRB5_NT_PRINCIPAL /pass +rndPassoutputtextTargeting domain controller: windowsserver.example.comUsing legacy password setting methodSuccessfully mapped HTTP/webapp.example.com to loadbalancer1.Key created.Output keytab to C:\loadbalancer1.keytabKeytab version: 0x502keysize 90 HTTP/webapp.example.com@EXAMPLE.COM ptype 1 (KRB5_NT_PRINCIPAL) vno 3 etype 0x12 (AES256-SHA1) keylength 32outputtextTargeting domain controller: windowsserver.example.comUsing legacy password setting methodSuccessfully mapped HTTP/webapp.example.com to loadbalancer1.Key created.Output keytab to C:\loadbalancer1.keytabKeytab version: 0x502keysize 90 HTTP/webapp.example.com@EXAMPLE.COM ptype 1 (KRB5_NT_PRINCIPAL) vno 3 etype 0x12 (AES256-SHA1) keylength 32In this example:
Field Description /outThe keytab to produce. /princThe principal name (HTTP/FQDN@REALM). /mapUserMaps the principal to the given user account. /cryptoThe cryptosystem to use. AES256-SHA1meansAES256-CTS-HMAC-SHA1-96./pTypeThe principal type. KRB5_NT_PRINCIPALis the general, recommended ptype./passSets the password. +rndPassGenerates a random password. View the Service Principal Name
To view a user account’s Service Principal Name:
- Open Server Manager and go to Tools > Active Directory Users and Computers.
- In the Active Directory Users and Computers window, open the View menu and enable Advanced Features.
- Expand your domain, select Users, and then double-click the user to view its properties. In our example, we created a user named
loadbalancer1. - On the user’s properties, select the Attribute Editor tab.
- Scroll to the servicePrincipalName to see its value. In our example, the value is
HTTP/webapp.example.com.
- Maps the Service Principal Name
Add a DNS record Jump to heading
Add a DNS record for your web app, pointed at your load balancer.
-
On your AD domain controller, go to Server Manager > Tools > DNS.
-
Expand Forward Lookup Zones in the tree, right-click on your domain (for example,
example.com) and select New Host (A or AAAA). -
On the New Host dialog, set the name. For example,
webapp. -
Set the IP address. For example, use your load balancer’s IP address.
-
Click Add Host.
You should see a dialog that says “The host record was successfully created”.
Optional: Disable NTLM Jump to heading
By disabling NTLM altogether you can make your network safer and eliminate the chance that the user’s browser and Windows Server will try to use it.
NTLM is an older and less secure protocol than Kerberos that runs in some Windows Active Directory domains. To authenticate with Kerberos over HTTP, the user’s web browser will exchange a series of messages with Windows Server to negotiate which authentication protocol to use. This is how the Www-Authenticate: Negotiate HTTP header works. Though after this negotiation, the client and server may try to use NTLM instead of Kerberos.
To disable NTLM:
- On your AD domain controller, go to Server Manager > Tools > Group Policy Management.
- Expand your forest and the domains folder in the Group Policy Management tree.
- If you do not yet have a group policy object, right-click on your domain and choose Create a GPO in this domain, and Link it here. Assign the new GPO a name.
- Expand your domain, right-click your new policy object, and choose Edit. The Group Policy Management Editor appears.
- Under Computer Configuration > Policies > Windows Settings > Security Settings > Local Policies > Security Options, double click the setting named Network security: Restrict NTLM: NTLM authentication in this domain. Set its value to
Disable. - Optional: To speed up propagation of the new setting, on the target PC joined to the domain run PowerShell as an administrator and execute the command
gpupdate /force.
Configure HAProxy Enterprise Jump to heading
In this section, you will configure HAProxy Enterprise for Kerberos authentication.
Install and configure the module Jump to heading
-
Install the SSO module according to your platform:
nixsudo apt-get install hapee-extras-spoa-ssonixsudo apt-get install hapee-extras-spoa-ssonixsudo yum install hapee-extras-spoa-ssonixsudo yum install hapee-extras-spoa-ssonixsudo zypper install hapee-extras-spoa-ssonixsudo zypper install hapee-extras-spoa-ssonixsudo pkg install hapee-extras-spoa-ssonixsudo pkg install hapee-extras-spoa-ssoIt installs the following files:
File Description /opt/hapee-extras/bin/hapee-krb-srvDefines the SSO Kerberos service program. /etc/hapee-extras/hapee-krb-srv-spoe.cfgDefines how the load balancer passes data via the Stream Processing Offload Protocol to the SSO Kerberos service. Typically, you will not need to edit this file. /etc/hapee-extras/hapee-krb-srv.cfgGives an example portion of an HAProxy Enterprise load balancer configuration that you can copy-paste. /etc/hapee-extras/hapee-sso-spoe.cfgNot used in this setup. /etc/hapee-extras/hapee-sso.cfgNot used in this setup. /etc/hapee-extras/sample/krb-srv.iniSets the location of your keytab file for each application. /etc/hapee-extras/sample/krb-srv.mapMaps HTTP Hostheaders to applications./etc/hapee-extras/sample/sso.iniNot used in this setup. /etc/hapee-extras/sample/sso.mapNot used in this setup. /etc/default/hapee-extras-ssoDefines the default settings for the hapee-extras-spoa-krb-srvservice. The file sets theKRBSRV_OPTIONSenvironment variable. -
Copy the keytab file from Windows Server to the load balancer. For example, save it as
/etc/hapee-extras/keytabs/loadbalancer1.keytab.nixsudo mkdir -p /etc/hapee-extras/keytabssudo cp ~/loadbalancer1.keytab /etc/hapee-extras/keytabs/nixsudo mkdir -p /etc/hapee-extras/keytabssudo cp ~/loadbalancer1.keytab /etc/hapee-extras/keytabs/ -
Copy the files
krb-srv.iniandkrb-srv.mapfrom thesampledirectory to/etc/hapee-extras:nixsudo cp /etc/hapee-extras/sample/krb-srv.* /etc/hapee-extras/nixsudo cp /etc/hapee-extras/sample/krb-srv.* /etc/hapee-extras/ -
Edit
/etc/hapee-extras/krb-srv.ini. Add adomainsection for your application and set the path to the keytab file. Also add an application section that references the domain section.krb-srv.iniini[domain:webapp.example.com]krb_keytab_file = /etc/hapee-extras/keytabs/loadbalancer1.keytab[webapp]domain = webapp.example.comkrb-srv.iniini[domain:webapp.example.com]krb_keytab_file = /etc/hapee-extras/keytabs/loadbalancer1.keytab[webapp]domain = webapp.example.com -
Edit
/etc/hapee-extras/krb-srv.map. Add a line that maps the HTTPHostheader that you expect with the domain and app.krb-srv.maptext# Host header # doman / appwebapp.example.com webapp.example.com/webappkrb-srv.maptext# Host header # doman / appwebapp.example.com webapp.example.com/webapp -
Edit your main load balancer configuration file,
/etc/hapee-2.8/hapee-lb.cfg.-
Add the SSO Kerberos lines to the
frontendfor which you want to enable single sign-on:hapee-lb.cfghaproxyfrontend wwwbind :80default_backend servers#--------------------------------# SSO Kerberos section#--------------------------------#option http-buffer-requestfilter spoe engine spoe_krb_srv config /etc/hapee-extras/hapee-krb-srv-spoe.cfg# HTTP REQUEST# set sso_app and sso_domain variables before calling the SPOAhttp-request set-var(txn.sso_domain) req.hdr(Host),map(/etc/hapee-extras/krb-srv.map),word(1,'/')http-request set-var(txn.sso_app) req.hdr(Host),map(/etc/hapee-extras/krb-srv.map),word(2,'/')# set sess.sso_cookie variable with the cookie set by the browserhttp-request set-var(sess.sso_cookie) req.cook(sso_cookie) if { req.cook(sso_cookie) -m found }# We expect to find an authorization header even if an sso_cookie existshttp-request return status 401 hdr www-authenticate Negotiate unless { req.hdr(authorization) -m found }http-request send-spoe-group spoe_krb_srv grp-sso-check-tokenhttp-request deny if { var(txn.sso.action) -m str dny }http-request deny if ! { var(txn.sso.action) -m str alw frm }# The agent can extract a display name from a validated Kerberos tokenhttp-request del-header X-SSO-LOGINhttp-request set-header X-SSO-LOGIN %[var(txn.sso.sso_login)] if { var(txn.sso.sso_login) -m found }# If the SPOA has set txn.sso.www_authenticate or sess.sso.sso_set_cookie variables, we set the header accordinglyhttp-response add-header Set-Cookie sso_cookie=%[var(sess.sso.sso_set_cookie)];\ path=/;\ domain=%[var(sess.sso.sso_set_cookie_domain)]; if { var(sess.sso.sso_set_cookie) -m found }http-response add-header www-authenticate %[var(txn.sso.www_authenticate)] if { var(txn.sso.www_authenticate) -m found }# BACKENDSdefault_backend sso_erruse_backend sso_err if { var(txn.sso.action) -m str err } # we got an error from the SPOAuse_backend %[var(txn.sso.backend)] if { var(txn.sso.action) -m str alw } { var(txn.sso.backend) -m found }hapee-lb.cfghaproxyfrontend wwwbind :80default_backend servers#--------------------------------# SSO Kerberos section#--------------------------------#option http-buffer-requestfilter spoe engine spoe_krb_srv config /etc/hapee-extras/hapee-krb-srv-spoe.cfg# HTTP REQUEST# set sso_app and sso_domain variables before calling the SPOAhttp-request set-var(txn.sso_domain) req.hdr(Host),map(/etc/hapee-extras/krb-srv.map),word(1,'/')http-request set-var(txn.sso_app) req.hdr(Host),map(/etc/hapee-extras/krb-srv.map),word(2,'/')# set sess.sso_cookie variable with the cookie set by the browserhttp-request set-var(sess.sso_cookie) req.cook(sso_cookie) if { req.cook(sso_cookie) -m found }# We expect to find an authorization header even if an sso_cookie existshttp-request return status 401 hdr www-authenticate Negotiate unless { req.hdr(authorization) -m found }http-request send-spoe-group spoe_krb_srv grp-sso-check-tokenhttp-request deny if { var(txn.sso.action) -m str dny }http-request deny if ! { var(txn.sso.action) -m str alw frm }# The agent can extract a display name from a validated Kerberos tokenhttp-request del-header X-SSO-LOGINhttp-request set-header X-SSO-LOGIN %[var(txn.sso.sso_login)] if { var(txn.sso.sso_login) -m found }# If the SPOA has set txn.sso.www_authenticate or sess.sso.sso_set_cookie variables, we set the header accordinglyhttp-response add-header Set-Cookie sso_cookie=%[var(sess.sso.sso_set_cookie)];\ path=/;\ domain=%[var(sess.sso.sso_set_cookie_domain)]; if { var(sess.sso.sso_set_cookie) -m found }http-response add-header www-authenticate %[var(txn.sso.www_authenticate)] if { var(txn.sso.www_authenticate) -m found }# BACKENDSdefault_backend sso_erruse_backend sso_err if { var(txn.sso.action) -m str err } # we got an error from the SPOAuse_backend %[var(txn.sso.backend)] if { var(txn.sso.action) -m str alw } { var(txn.sso.backend) -m found } -
Ensure that the name of the
backendfor your application matches the name of the application section inkrb-srv.ini. In our example,krb-srv.inicontained[webapp], so we would name the backendwebapp:hapee-lb.cfghaproxybackend webappbalance roundrobinserver web1 127.0.0.1:3000 checkhapee-lb.cfghaproxybackend webappbalance roundrobinserver web1 127.0.0.1:3000 check -
Add the following two
backendsections:hapee-lb.cfghaproxybackend sso_errmode httpbackend spoa-backendmode tcptimeout server 1mserver sso-daemon 127.0.0.1:12345 inter 1s checkhapee-lb.cfghaproxybackend sso_errmode httpbackend spoa-backendmode tcptimeout server 1mserver sso-daemon 127.0.0.1:12345 inter 1s check
-
-
Reload the load balancer:
nixsudo systemctl reload hapee-2.8-lbnixsudo systemctl reload hapee-2.8-lb -
Enable and start the service:
nixsudo systemctl enable hapee-extras-spoa-krb-srvsudo systemctl start hapee-extras-spoa-krb-srvnixsudo systemctl enable hapee-extras-spoa-krb-srvsudo systemctl start hapee-extras-spoa-krb-srv -
The service’s status should indicate that it is now configured for the new application.
nixsudo systemctl status hapee-extras-spoa-krb-srvnixsudo systemctl status hapee-extras-spoa-krb-srvoutputtexthapee systemd[1]: Starting hapee-extras-spoa-krb-srv.service - HAPEE SPOA-KRB-SRV: HAPEE SSO solution...hapee hapee-krb-srv[4955]: [00] Configured domains:hapee hapee-krb-srv[4955]: 1713465556.954921 [00] Configured domains:hapee hapee-krb-srv[4955]: 1713465556.954951 [00] domain:webapp.example.com (1 app)hapee hapee-krb-srv[4955]: [00] domain:webapp.example.com (1 app)hapee hapee-krb-srv[4956]: 1713465556.956454 [00] SSO Server will start in background, pid=4956hapee hapee-krb-srv[4956]: [00] SSO Server will start in background, pid=4956hapee systemd[1]: Started hapee-extras-spoa-krb-srv.service - HAPEE SPOA-KRB-SRV: HAPEE SSO solution.hapee HAProxy-sso[4956]: [00] SSO server is ready and listening on port 12345outputtexthapee systemd[1]: Starting hapee-extras-spoa-krb-srv.service - HAPEE SPOA-KRB-SRV: HAPEE SSO solution...hapee hapee-krb-srv[4955]: [00] Configured domains:hapee hapee-krb-srv[4955]: 1713465556.954921 [00] Configured domains:hapee hapee-krb-srv[4955]: 1713465556.954951 [00] domain:webapp.example.com (1 app)hapee hapee-krb-srv[4955]: [00] domain:webapp.example.com (1 app)hapee hapee-krb-srv[4956]: 1713465556.956454 [00] SSO Server will start in background, pid=4956hapee hapee-krb-srv[4956]: [00] SSO Server will start in background, pid=4956hapee systemd[1]: Started hapee-extras-spoa-krb-srv.service - HAPEE SPOA-KRB-SRV: HAPEE SSO solution.hapee HAProxy-sso[4956]: [00] SSO server is ready and listening on port 12345
Optional: Add a second application Jump to heading
To add another application to SSO:
-
On your Windows Server, add a DNS record for the new application.
- On your AD domain controller, go to Server Manager > Tools > DNS.
- Expand Forward Lookup Zones in the tree, right-click on your domain (for example,
example.com) and select New Host (A or AAAA). - On the New Host dialog, set the name. For example,
webapp2. - Set the IP address. For example, use your load balancer’s IP address.
- Click Add Host.
-
To add more SPNs to the user account to support other web applications, use the
/inargument when callingktpassto append new SPNs:powershellktpass /in C:\loadbalancer1.keytab /out C:\loadbalancer1.keytab /princ HTTP/webapp2.example.com@EXAMPLE.COM /mapUser example\loadbalancer1 /crypto AES256-SHA1 /pType KRB5_NT_PRINCIPAL /pass +rndPasspowershellktpass /in C:\loadbalancer1.keytab /out C:\loadbalancer1.keytab /princ HTTP/webapp2.example.com@EXAMPLE.COM /mapUser example\loadbalancer1 /crypto AES256-SHA1 /pType KRB5_NT_PRINCIPAL /pass +rndPassoutputtextExisting keytab:keytab version: 0x502keysize 90 HTTP/webapp.example.com@EXAMPLE.COM pType 1 (KRB5_NT_PRINCIPAL) vno 3 etype 0x12 (AES256-SHA1) keylength 32Targeting domain controller: windowsserver.example.comUsing legacy password setting methodSuccessfully mapped HTTP/webapp2.example.com to loadbalancer1.Key created.Output keytab to C:\loadbalancer1.keytab:Keytab version: 0x502keysize 90 HTTP/webapp.example.com@EXAMPLE.COM ptype1 (KRB5_NT_PRINCIPAL) vno 3 etype 0x12 (AES256-SHA1) keylength 32keysize 91 HTTP/webapp2.example.com@EXAMPLE.COM ptype1 (KRB5_NT_PRINCIPAL) vno 3 etype 0x12 (AES256-SHA1) keylength 32outputtextExisting keytab:keytab version: 0x502keysize 90 HTTP/webapp.example.com@EXAMPLE.COM pType 1 (KRB5_NT_PRINCIPAL) vno 3 etype 0x12 (AES256-SHA1) keylength 32Targeting domain controller: windowsserver.example.comUsing legacy password setting methodSuccessfully mapped HTTP/webapp2.example.com to loadbalancer1.Key created.Output keytab to C:\loadbalancer1.keytab:Keytab version: 0x502keysize 90 HTTP/webapp.example.com@EXAMPLE.COM ptype1 (KRB5_NT_PRINCIPAL) vno 3 etype 0x12 (AES256-SHA1) keylength 32keysize 91 HTTP/webapp2.example.com@EXAMPLE.COM ptype1 (KRB5_NT_PRINCIPAL) vno 3 etype 0x12 (AES256-SHA1) keylength 32 -
Copy the keytab file to the load balancer.
-
Edit
/etc/hapee-extras/krb-srv.ini. Add adomainsection for your application and set the path to the keytab file. Also add an application section that references the domain section.krb-srv.iniini[domain:webapp.example.com]krb_keytab_file = /etc/hapee-extras/keytabs/loadbalancer1.keytab[webapp]domain = webapp.example.com[domain:webapp2.example.com]krb_keytab_file = /etc/hapee-extras/keytabs/loadbalancer1.keytab[webapp2]domain = webapp2.example.comkrb-srv.iniini[domain:webapp.example.com]krb_keytab_file = /etc/hapee-extras/keytabs/loadbalancer1.keytab[webapp]domain = webapp.example.com[domain:webapp2.example.com]krb_keytab_file = /etc/hapee-extras/keytabs/loadbalancer1.keytab[webapp2]domain = webapp2.example.com -
Edit
/etc/hapee-extras/krb-srv.map. Add a line that maps the HTTPHostheader that you expect with the domain and app.krb-srv.maptext# Host header # doman / appwebapp.example.com webapp.example.com/webappwebapp2.example.com webapp2.example.com/webapp2krb-srv.maptext# Host header # doman / appwebapp.example.com webapp.example.com/webappwebapp2.example.com webapp2.example.com/webapp2 -
Restart the SSO Kerberos service:
nixsudo systemctl restart hapee-extras-spoa-krb-srvnixsudo systemctl restart hapee-extras-spoa-krb-srvThe service’s status should indicate that it is now configured for the new application.
nixsudo systemctl status hapee-extras-spoa-krb-srvnixsudo systemctl status hapee-extras-spoa-krb-srvoutputtexthapee hapee-krb-srv[6283]: 1713397718.771858 [00] Configured domains:hapee hapee-krb-srv[6283]: 1713397718.771899 [00] domain:webapp.example.com (1 app)hapee hapee-krb-srv[6283]: 1713397718.771905 [00] domain:webapp2.example.com (1 app)outputtexthapee hapee-krb-srv[6283]: 1713397718.771858 [00] Configured domains:hapee hapee-krb-srv[6283]: 1713397718.771899 [00] domain:webapp.example.com (1 app)hapee hapee-krb-srv[6283]: 1713397718.771905 [00] domain:webapp2.example.com (1 app) -
Edit your main load balancer configuration file,
/etc/hapee-2.8/hapee-lb.cfg. Ensure that the name of thebackendfor your application matches the name of the application section inkrb-srv.ini. For example,webapp2:hapee-lb.cfghaproxybackend webapp2balance roundrobinserver web1 127.0.0.1:3001 checkhapee-lb.cfghaproxybackend webapp2balance roundrobinserver web1 127.0.0.1:3001 check -
Reload the load balancer:
nixsudo systemctl reload hapee-2.8-lbnixsudo systemctl reload hapee-2.8-lb
Configure user PCs Jump to heading
In this section, you will configure users’ Windows PCs for Kerberos authentication.
Update DNS and AD settings Jump to heading
To allow single sign-on in the AD domain, update the user’s PC to use the domain’s DNS server and, optionally, join the computer to the domain.
-
Update the user’s preferred DNS server to point to Windows Server. That way, they can access internal subdomains like
webapp.example.com. On the user’s PC:-
On the Desktop, click the Start button, type
Control Panel, and then pressenter. -
Navigate to Network and Internet, and then Network and Sharing Center.
-
Click Change adapter settings.
-
Right-click on your adapter (for example, Ethernet) and select Properties.
-
On the adapter’s Properties dialog, double-click Internet Protocol Version 4 (TCP/IPv4) to open the protocol’s properties.
-
Click Advanced, then select the DNS tab.
-
Under DNS server addresses, click Add, then enter the IP address of your Windows Server. Click Add.
-
Click OK to save the change.
-
To verify, open PowerShell and use
nslookupto retrieve the IP address for your AD domain controller server. For example:powershellnslookup windowsserver.example.compowershellnslookup windowsserver.example.comoutputtextName: windowsserver.example.comAddresses: 192.168.56.60outputtextName: windowsserver.example.comAddresses: 192.168.56.60
-
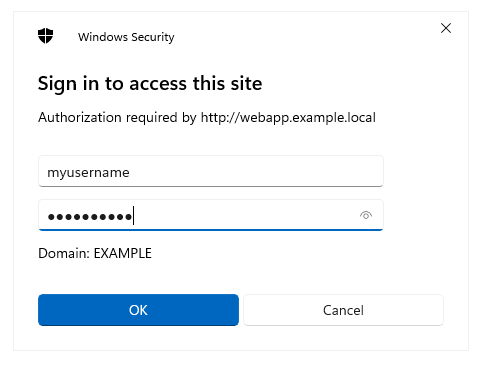
When the user accesses the web application, for example webapp.example.com, through their browser, they will see a login prompt. They can enter their Active Directory credentials.
Optional: Integrated authentication Jump to heading
To skip the login prompt and instead enable Microsoft Edge to use the credentials of the logged-in Windows user, enable integrated authentication. This allows the browser to use the credentials from the Windows operating system and skip being prompted. You will set this as a Group Policy so that it applies to all computers joined to the Active Directory domain.
- On the Active Directory domain controller, go to the Microsoft Edge website and click the link Download Windows 64-bit Policy to download the archive. Extract the contents of the archive.
- In Windows Explorer, navigate to the policies directory for your domain. For example, for the domain
example.com, it would beC:\Windows\SYSVOL\sysvol\example.com\Policies. From there, create a directory namedPolicyDefinitions. - From the extracted archive, copy the contents of the
MicrosoftEdgePolicyTemplates\windows\admxdirectory into the newPolicyDefinitionsdirectory. - Open Server Manager and go to Tools > Group Policy Management. Expand your forest and domain in the Group Policy Management tree.
- If you do not yet have a group policy object, right-click on your domain and choose Create a GPO in this domain, and Link it here. Assign the new GPO a name.
- Expand your domain, right-click your new policy object, and choose Edit. The Group Policy Management Editor appears.
- Under Computer Configuration > Policies > Administrative Templates, expand the new Microsoft Edge policy definition in the Group Policy Management Editor.
- Within HTTP Authentication, edit the setting named Configure list of allowed authentication servers, enable it, and set its value to your load balanced application. For example,
webapp.example.comor*.example.com. - Optional: If the setting Supported authentication schemes has been configured, then be sure its value includes
negotiate.
To verify that the policy has been rolled out:
- On the user’s PC, run PowerShell and execute
gpupdate /force. - Open Microsoft Edge and go to
edge://policyto see the applied policies. You should see the policy namedAuthServerAllowlistset to your target hostname.
Do you have any suggestions on how we can improve the content of this page?